Used for barrier jackets, Heras fence banners and most other types of finishing.
The *twin needle* creates two parallel lines of straight stitches meaning the stitches are less likely to break giving longer life to the product. # Tacking (Front and Back) Reverse feed stitching or back tacking is when the sewing machine makes a few reverse stitches at the beginning and end of the main stitch. This reinforces the stitching, reducing the likelihood of it coming undone from the ends. You can achieve this in 2 ways; 1. By pressing the sewing machine pedal back with your heel (it back tacks automatically) 2. By using the reverse feed lever **1.** The stitch goes in reverse when pressed down and forward again when released. [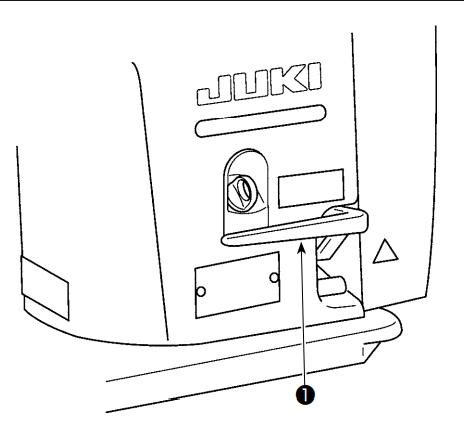](https://manual.maticmedia.co.uk/uploads/images/gallery/2022-09/screenshot-2022-09-22-144025.png) # Loading the Bobbin [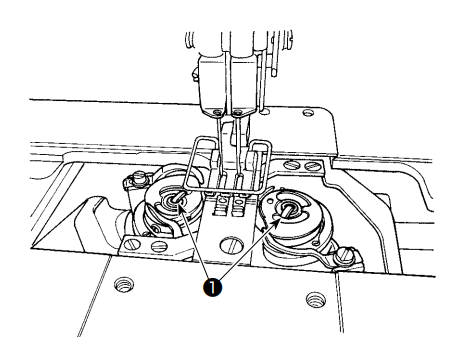](https://manual.maticmedia.co.uk/uploads/images/gallery/2022-09/image-1664185212700.png) 1. Turn the power off before replacing the bobbin. 2. Lift the latch **1** and take the bobbin out of its housing. 3. Replace the empty bobbin and lower the latch. # Parts & Consumables # Sewing a Standard Hem (Double Fold)| [](https://manual.maticmedia.co.uk/uploads/images/gallery/2022-11/double-hem-1.jpg) | [](https://manual.maticmedia.co.uk/uploads/images/gallery/2022-11/TW2double-hem-2.jpg) | [](https://manual.maticmedia.co.uk/uploads/images/gallery/2022-11/double-hem-3.jpg) |
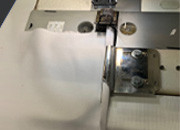
| **1.** Use the 10mm hemming guide above. | **2.** Insert the screw at the back of the guide into the hole and slide upwards | **3.** Once it's in place you're now ready to start sewing. |
| [](https://manual.maticmedia.co.uk/uploads/images/gallery/2022-11/double-hem-4.jpg) | [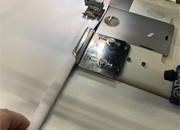](https://manual.maticmedia.co.uk/uploads/images/gallery/2022-11/double-hem-5.jpg) | |
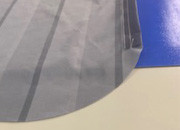
| **4.** Insert the material going from left to right into the hem guide. Push the material until it starts to curl around the guide. | **5.** Continue to curl the material as it goes through; this will help to make the hem. |
| [](https://manual.maticmedia.co.uk/uploads/images/gallery/2022-11/barrier-jacket-12.jpg) | [](https://manual.maticmedia.co.uk/uploads/images/gallery/2022-11/barrier-jacket-1.jpg) | [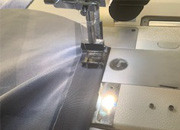](https://manual.maticmedia.co.uk/uploads/images/gallery/2022-11/barrier-jacket-5.jpg) |
| The finished barrier jacket should look like this. | Spread the material out - with the wrong side facing up. | Fold the flaps over on each side and stitch them from top to bottom, |
| [](https://manual.maticmedia.co.uk/uploads/images/gallery/2022-11/barrier-jacket-9.jpg) | [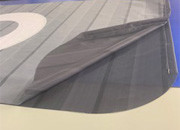](https://manual.maticmedia.co.uk/uploads/images/gallery/2022-11/barrier-jacket10.jpg) | [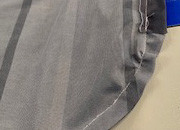](https://manual.maticmedia.co.uk/uploads/images/gallery/2022-11/barrier-jacket-4.jpg) |
| Each side should look like this and you are now ready to sew the two sides together. | Put the 2 sides together with printed sides facing each other. | Start sewing at the right side of the jacket following the curve until you get to the opposite side. |
Double-sided flag used with tall flag poles
When the flag is finished it should look like the image below [](https://manual.maticmedia.co.uk/uploads/images/gallery/2023-07/il-570xn-4759206443-42t7.webp) ##### **YOU WILL REQUIRE** - Black 60s thread for the machine head - Monofilament thread for the bobbin - The printed flag - White reinforcement tape - 2 Hooks with tape