Artwork Management
- Artwork Basics
- Uploading Artwork
- Adding Cut Lines / Digital Cut Marks
- Adding Drill Holes
- Curved Corners / Rounded Corners
- Setting up artwork with White Ink
- Pole Pockets
- Registration Marks
- Setting Up Double Sided Banners
- Adobe Cloud
- Shutterstock
- ACM | Dibond | Aluminium Composite - Folded Box Pans
- Bulk Uploading Artwork
- Fixing artwork off centre / wrong scale
- Editing a file with missing fonts or broken attachments
- Tiling Print Files / Splitting Pop Up Panels
Artwork Basics
Scale
Bleed
Trim Bleed
Finish Bleed
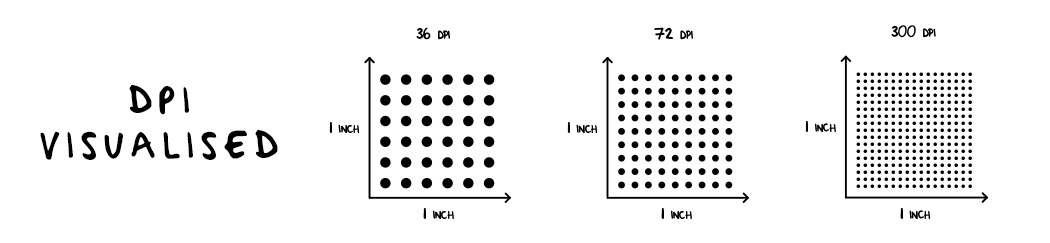
Dots Per Inch
Dots Per Inch is the measure of how many dots there are per inch of printed material. The higher the number of dots the higher the quality of print. It is used to express either the quality a print is printed at or an Image's Resolution.
A good way of visualising this is the diagram below.
Minimum Recommend Artwork Dpi
| Work Type | Minimum DPI |
| Business Cards & Leaflets | 300dpi |
| A0 Poster and Bigger | 100dpi |
Though we can print at lower resolutions depending on the viewing distance we always recommend a minimum DPI of 100
Dpi at Scale
| Scale | Multiply DPI / Scale By | Example |
| 25% | 4 | |
| 33% | 3 | |
| 10% | 10 | |
| 1% | 100 |
Viewing Distance vs DPI
| Viewing Distance | Min Resolution |
| 0.6m / 2ft | 300 dpi |
| 1m / 3.3ft | 180 dpi |
| 1.5m / 5ft | 120 dpi |
| 2m / 6.5ft | 90 dpi |
| 3m / 10ft | 60 dpi |
| 5m / 16ft | 35 dpi |
| 10m / 33ft | 18 dpi |
| 15m / 50ft | 12 dpi |
| 50m / 160ft | 4 dpi |
| 60m / 200ft | 3 dpi |
| 200m / 650ft | 1 dpi |
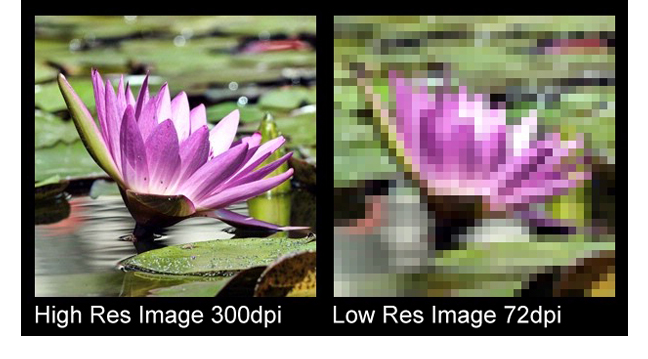
Low Resolution vs High Resolution
Low resolution is another way of saying low DPI or poor quality. High Resolution is another way of saying high DPI or high quality.
The images below show a high DPI (High Resolution) vs a low DPI (Low Resolution) image.
While you can convert a low resolution image to a high resolution image, You cannot convert a Low Resolution image to a High Resolution. There is an alternative called upscaling, which you can read about below.
Upscaling Images
Upscaling is the process of converting an image from Low Resolution to High Resolution. Basic upscaling is the simplest way of stretching a lower resolution image onto a larger display. Pixels from the lower resolution image are copied and repeated to fill out all the pixels of the higher resolution display.
More advance processes include Dithering (blurring the dots as you enlarge so you don't get a block effect) or AI (using computer prediction based on the surrounding dots to predict what the image should look like at a larger size).
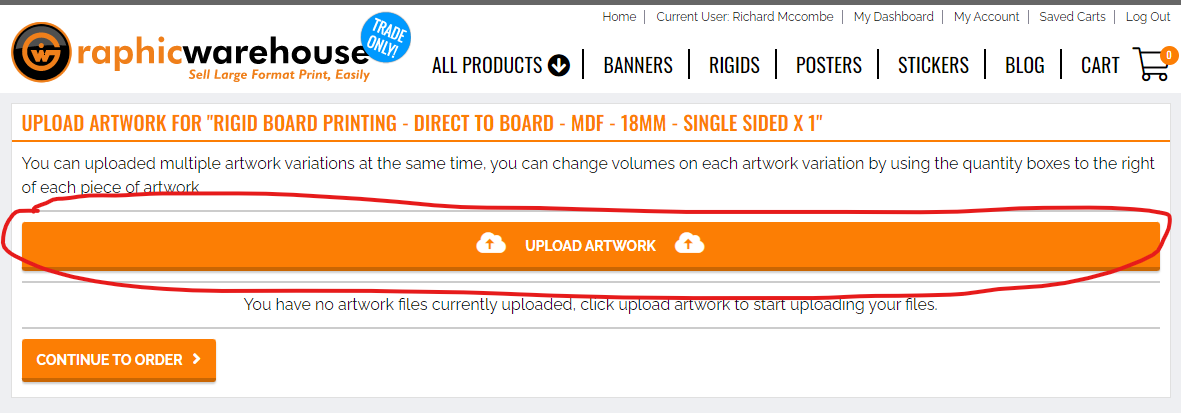
Uploading Artwork
Where do you upload files...
You can upload files on the artwork management screen. This is accessible from the Customer Portal Cart Screen or the Customer Viewing Quote Screen.
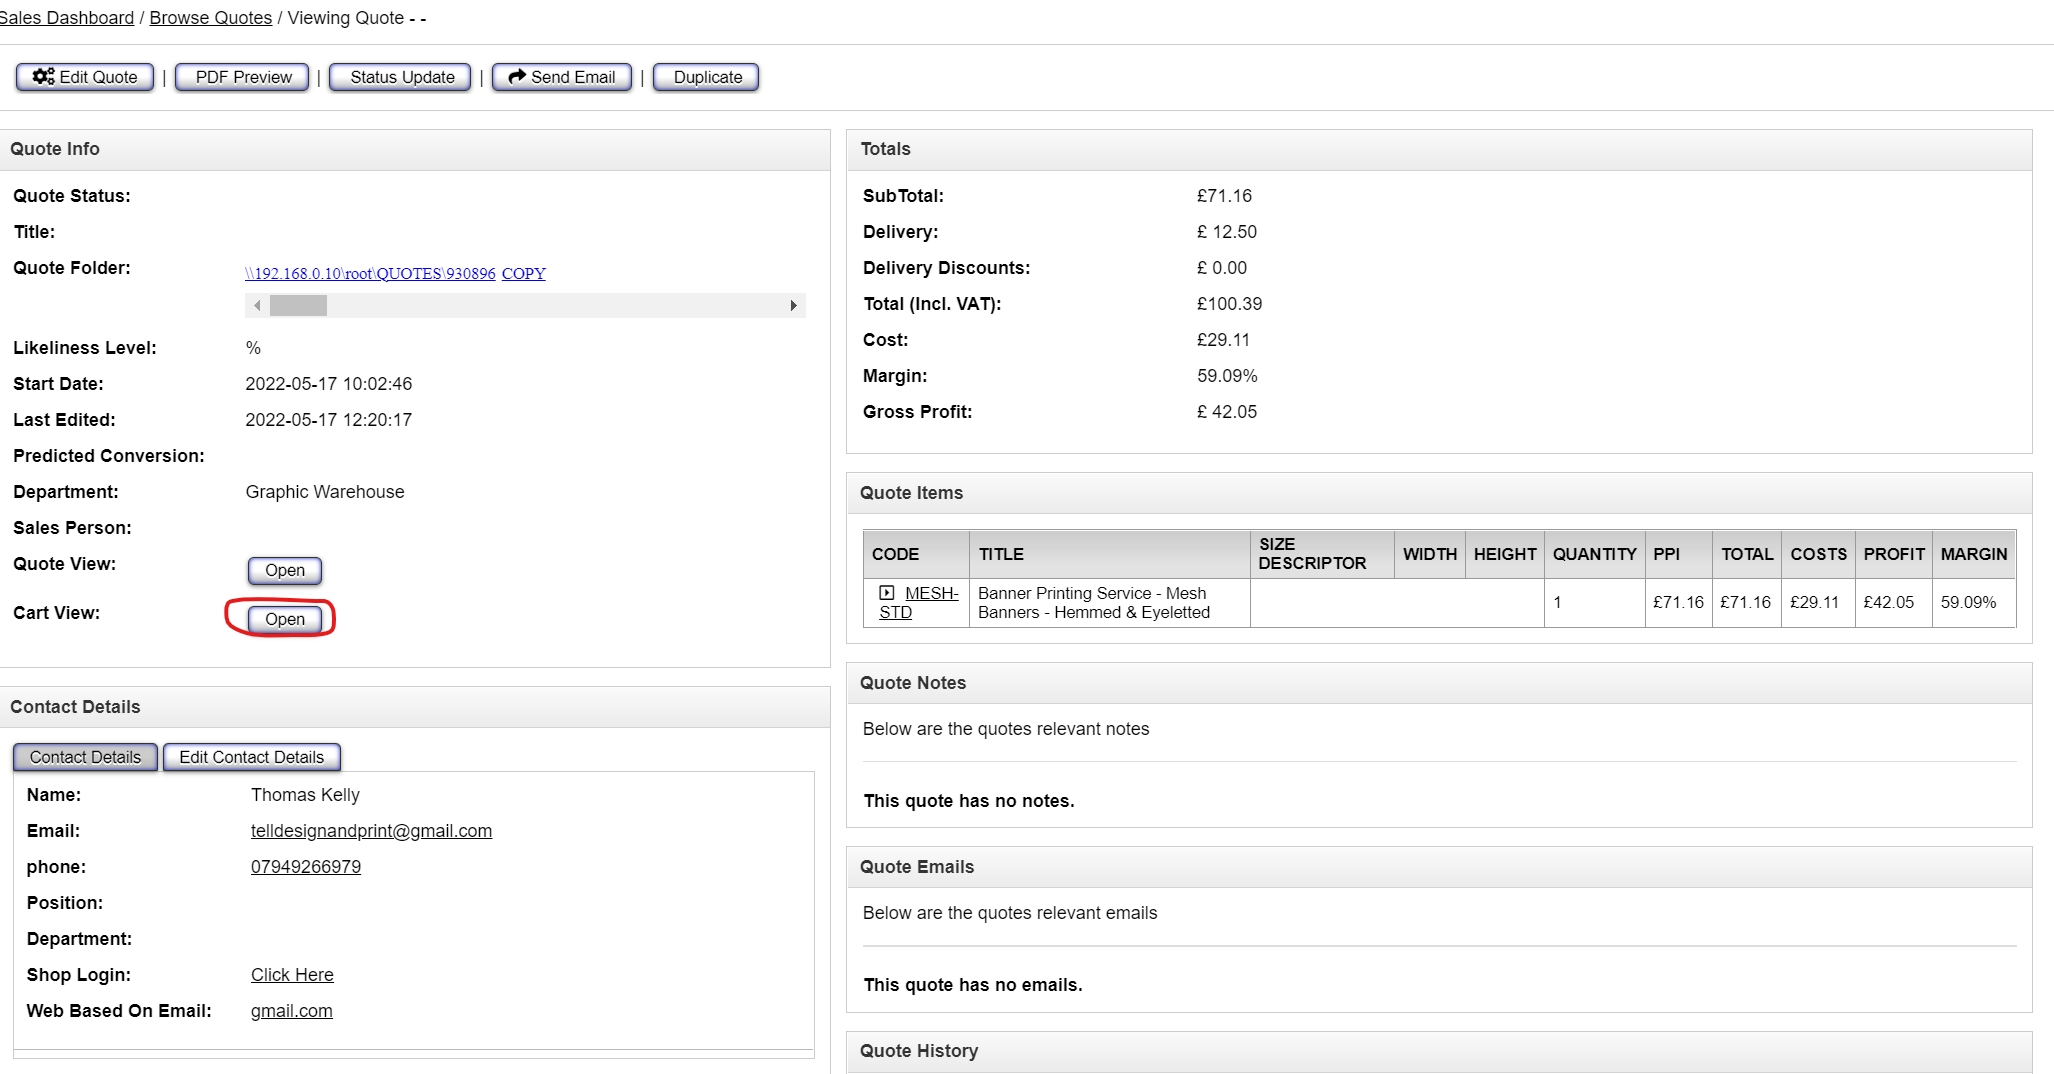
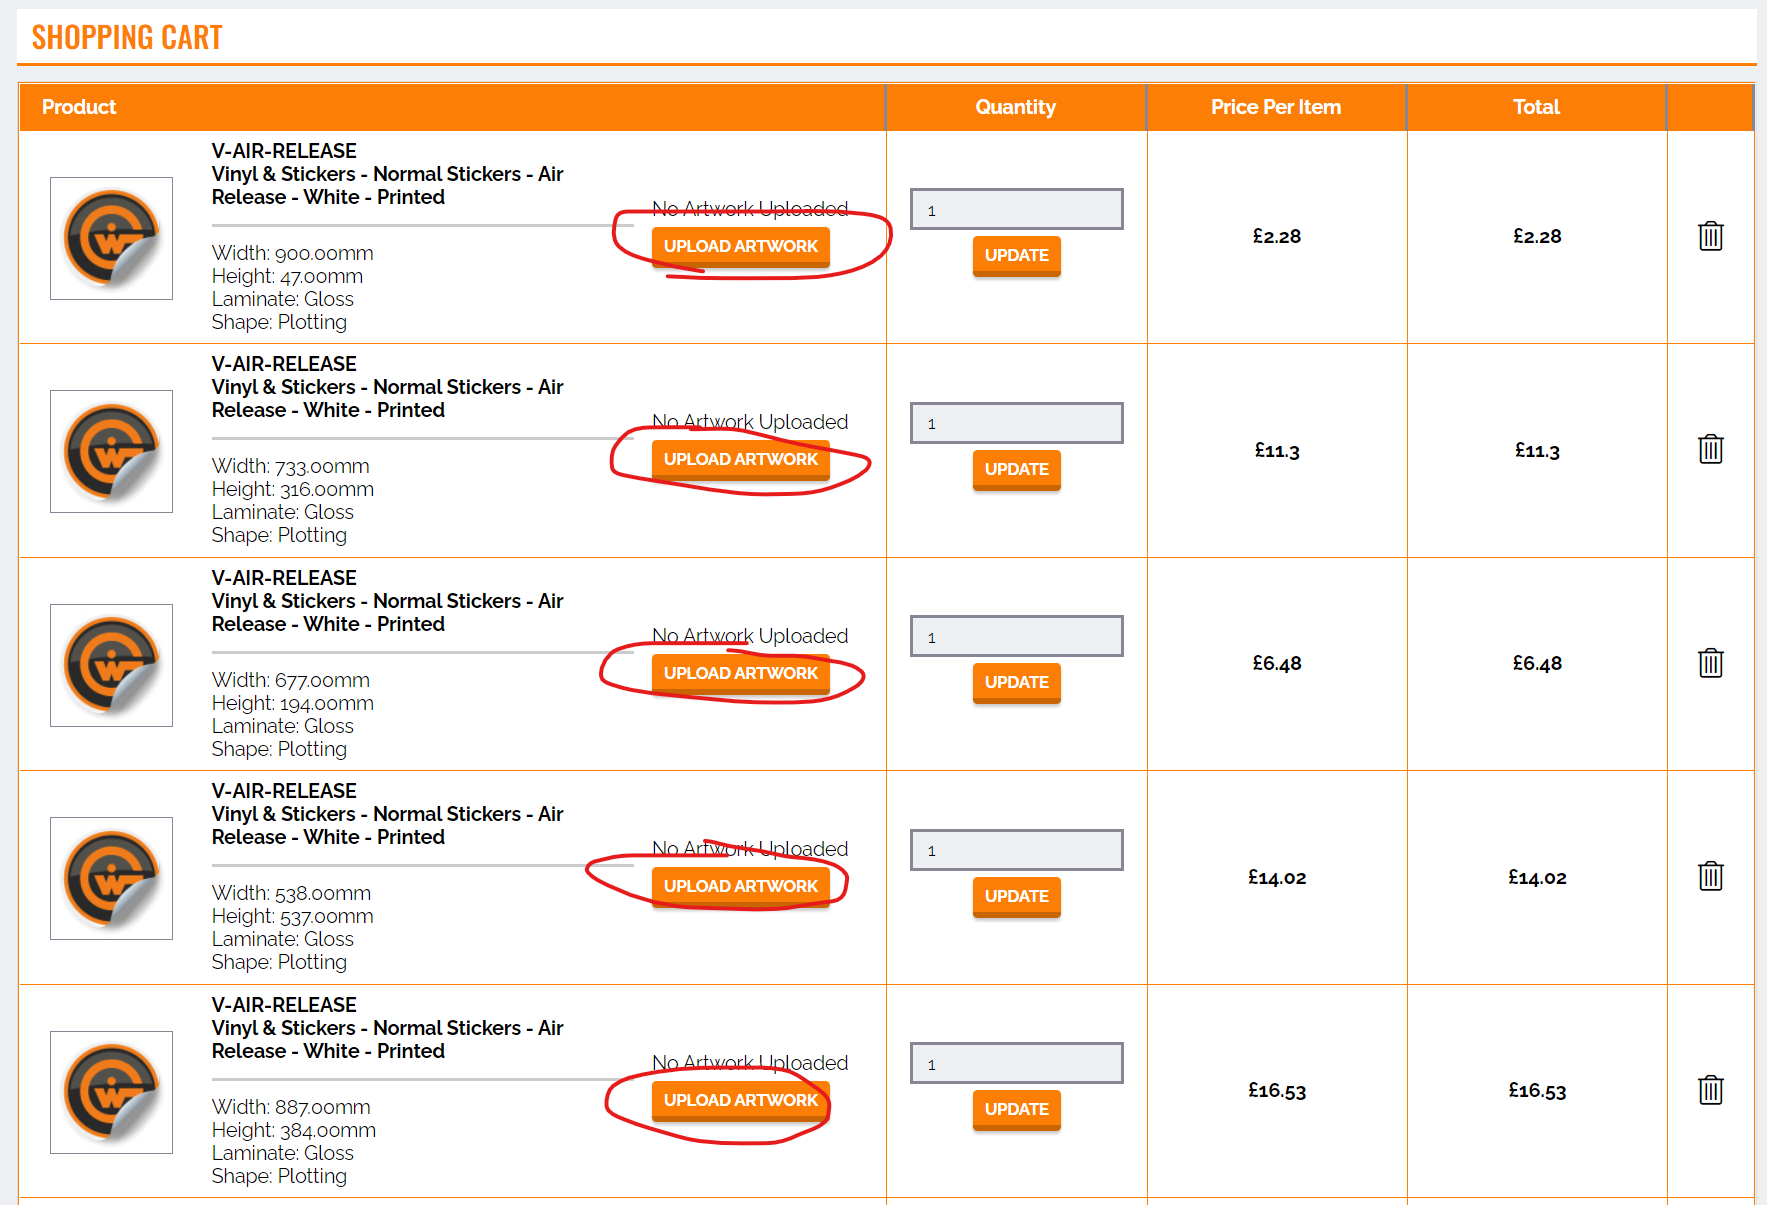
How to get to the Customer Cart Screen
- Go to a Cart the MaticTrack
- Click on the "Cart View" button

- Click on the "Edit Artwork" button on the size you want to upload/edit artwork on
EACH SIZE HAS ITS OWN EDIT ARTWORK BUTTON

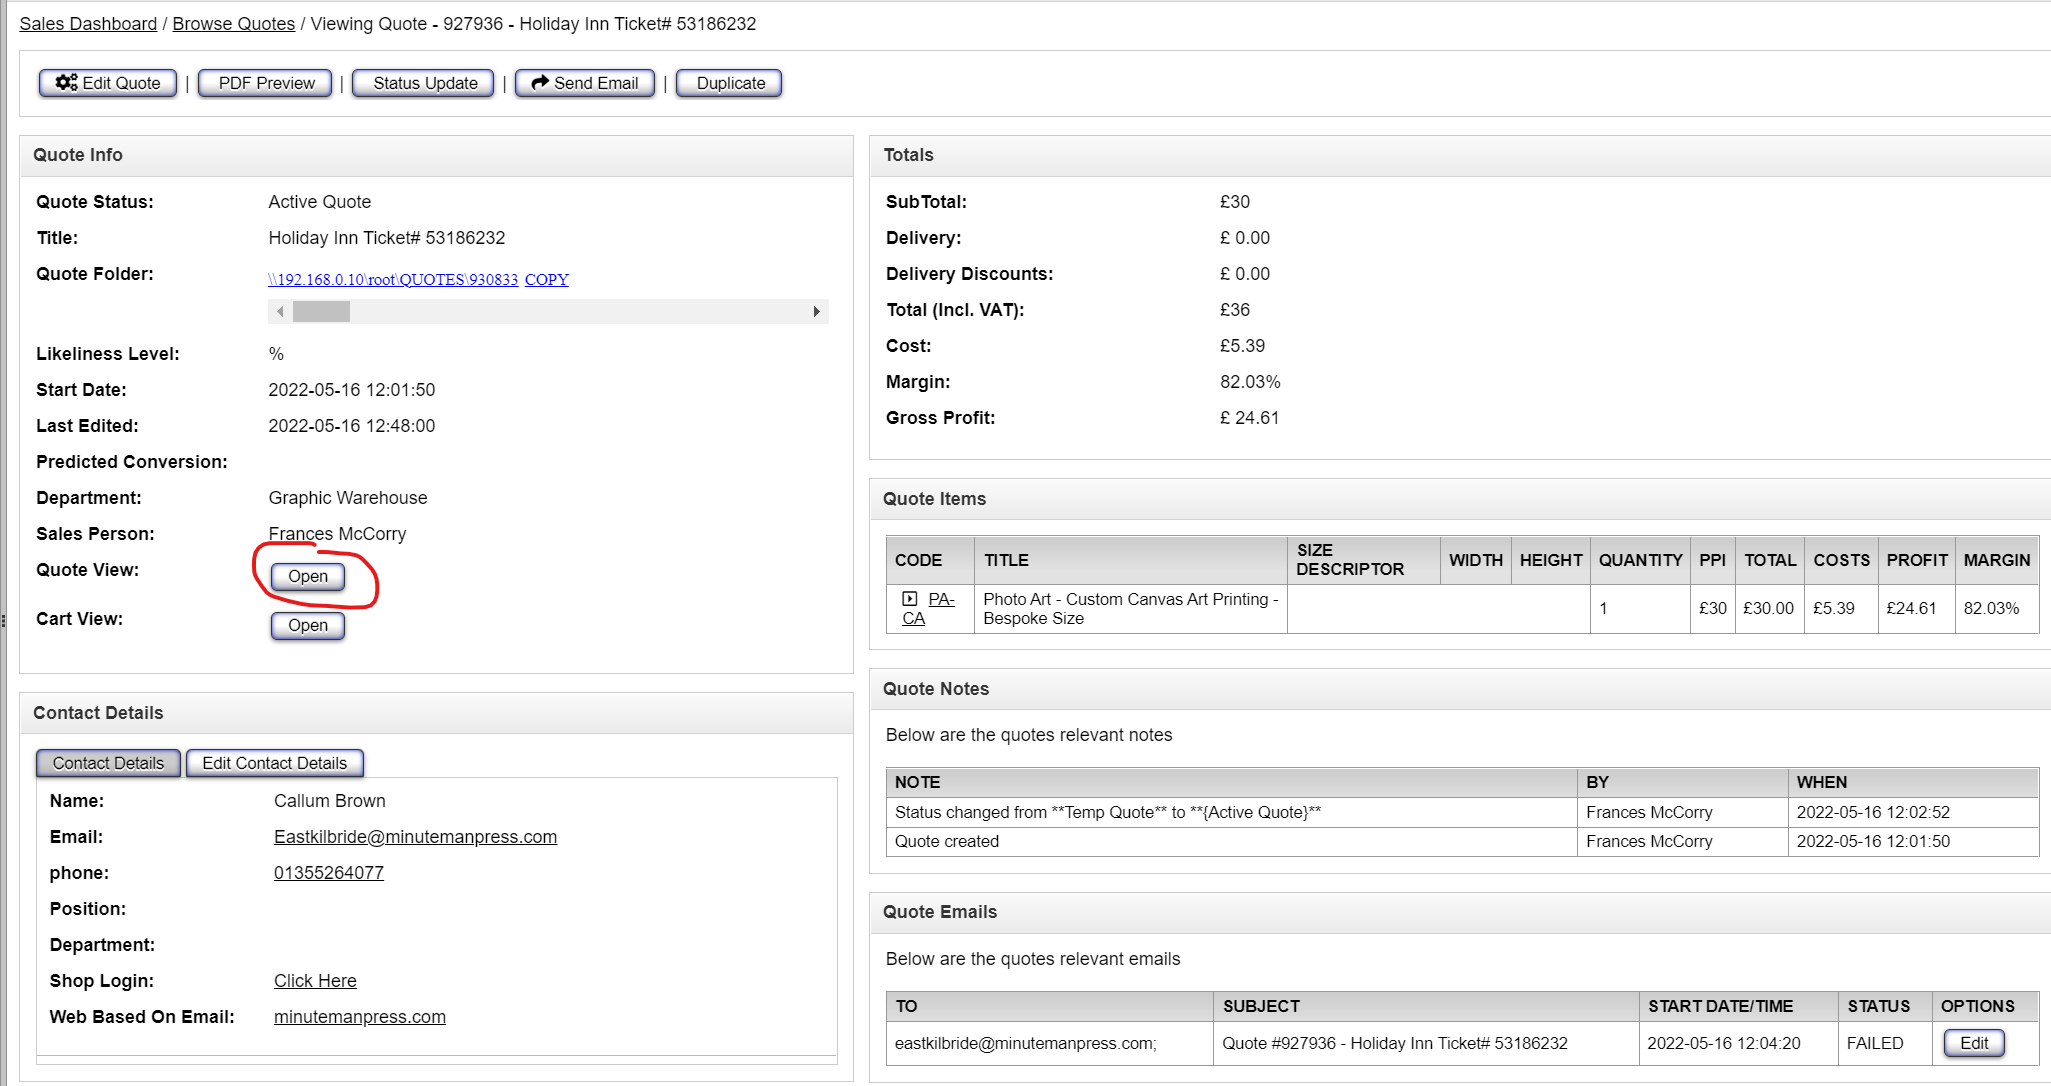
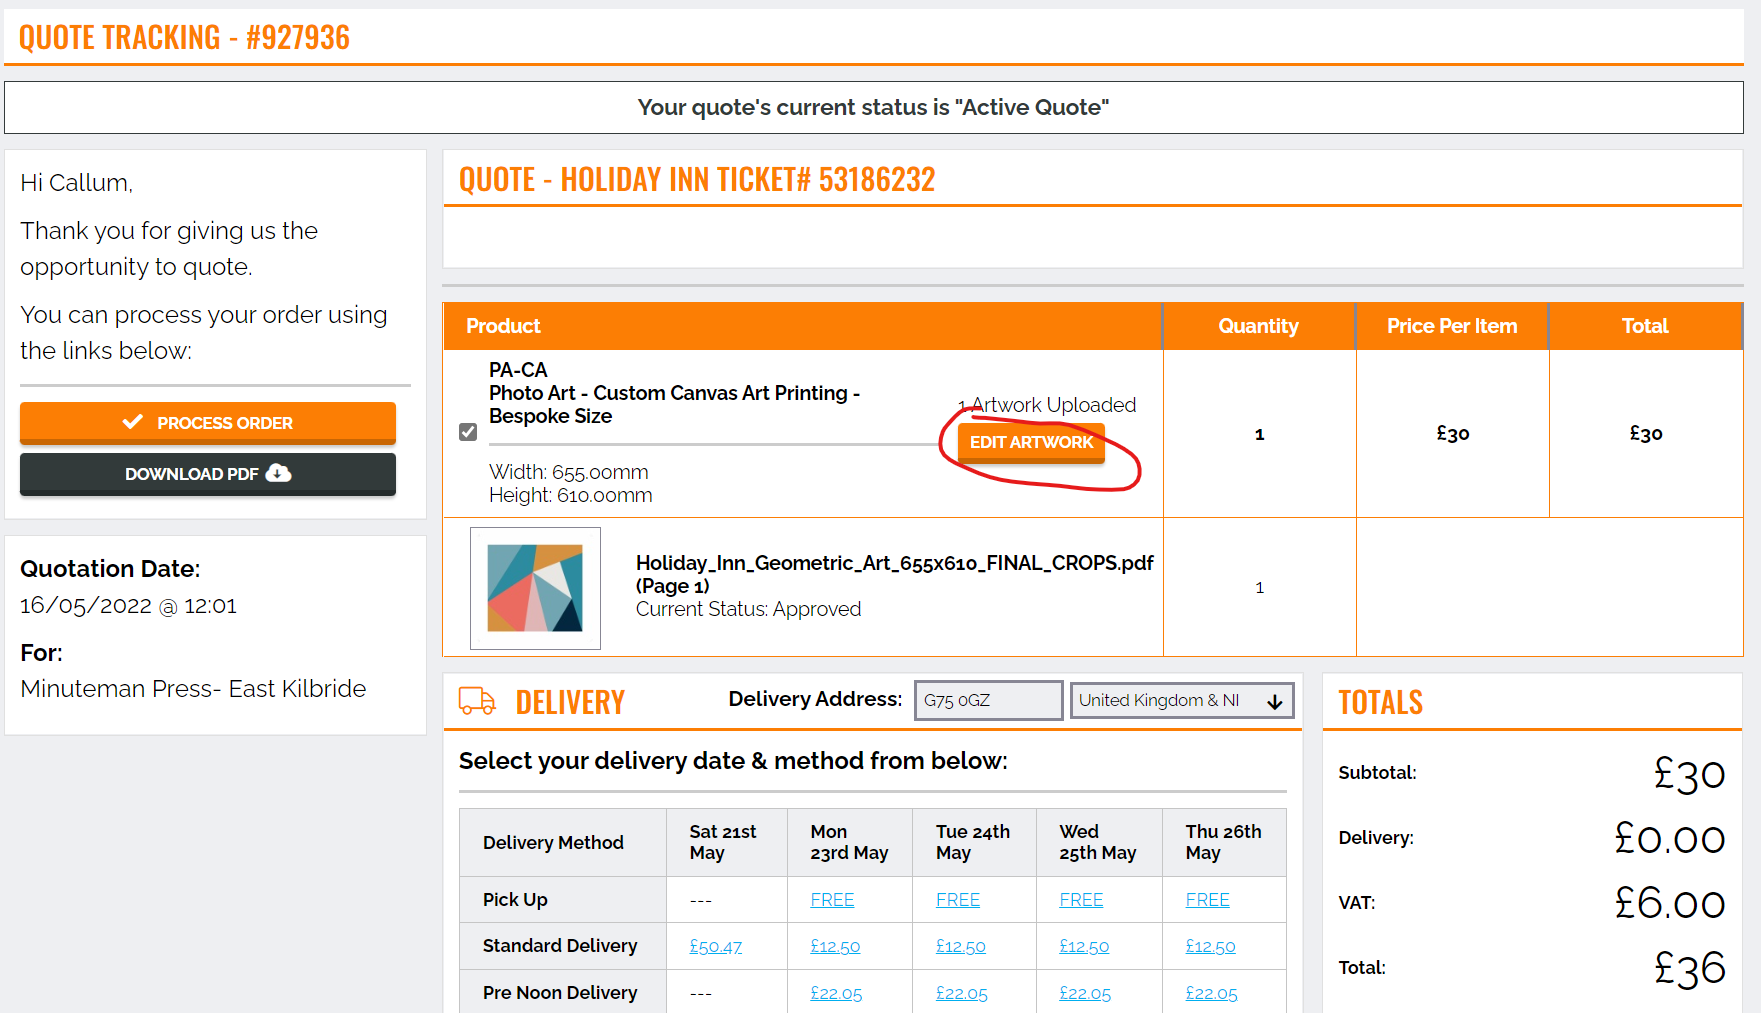
How to get to the Customer Quote Screen
- Go to a Quote on the MaticTrack
- Click the Quote View button as below

- Click on the "Edit Artwork" button for the item you want to upload the artwork for.
EACH SIZE HAS ITS OWN EDIT ARTWORK BUTTON

What kind of files can you upload...
The MaticTrack accepts the following file types
| EPS | PNG | |
| JPEG (JPG) | TIFF | WORD |
| PPT (Powerpoint) |
Maximum File Size
The system will accept file uploads of up to 1 Gigabytes in size.
What happens when you upload a file...

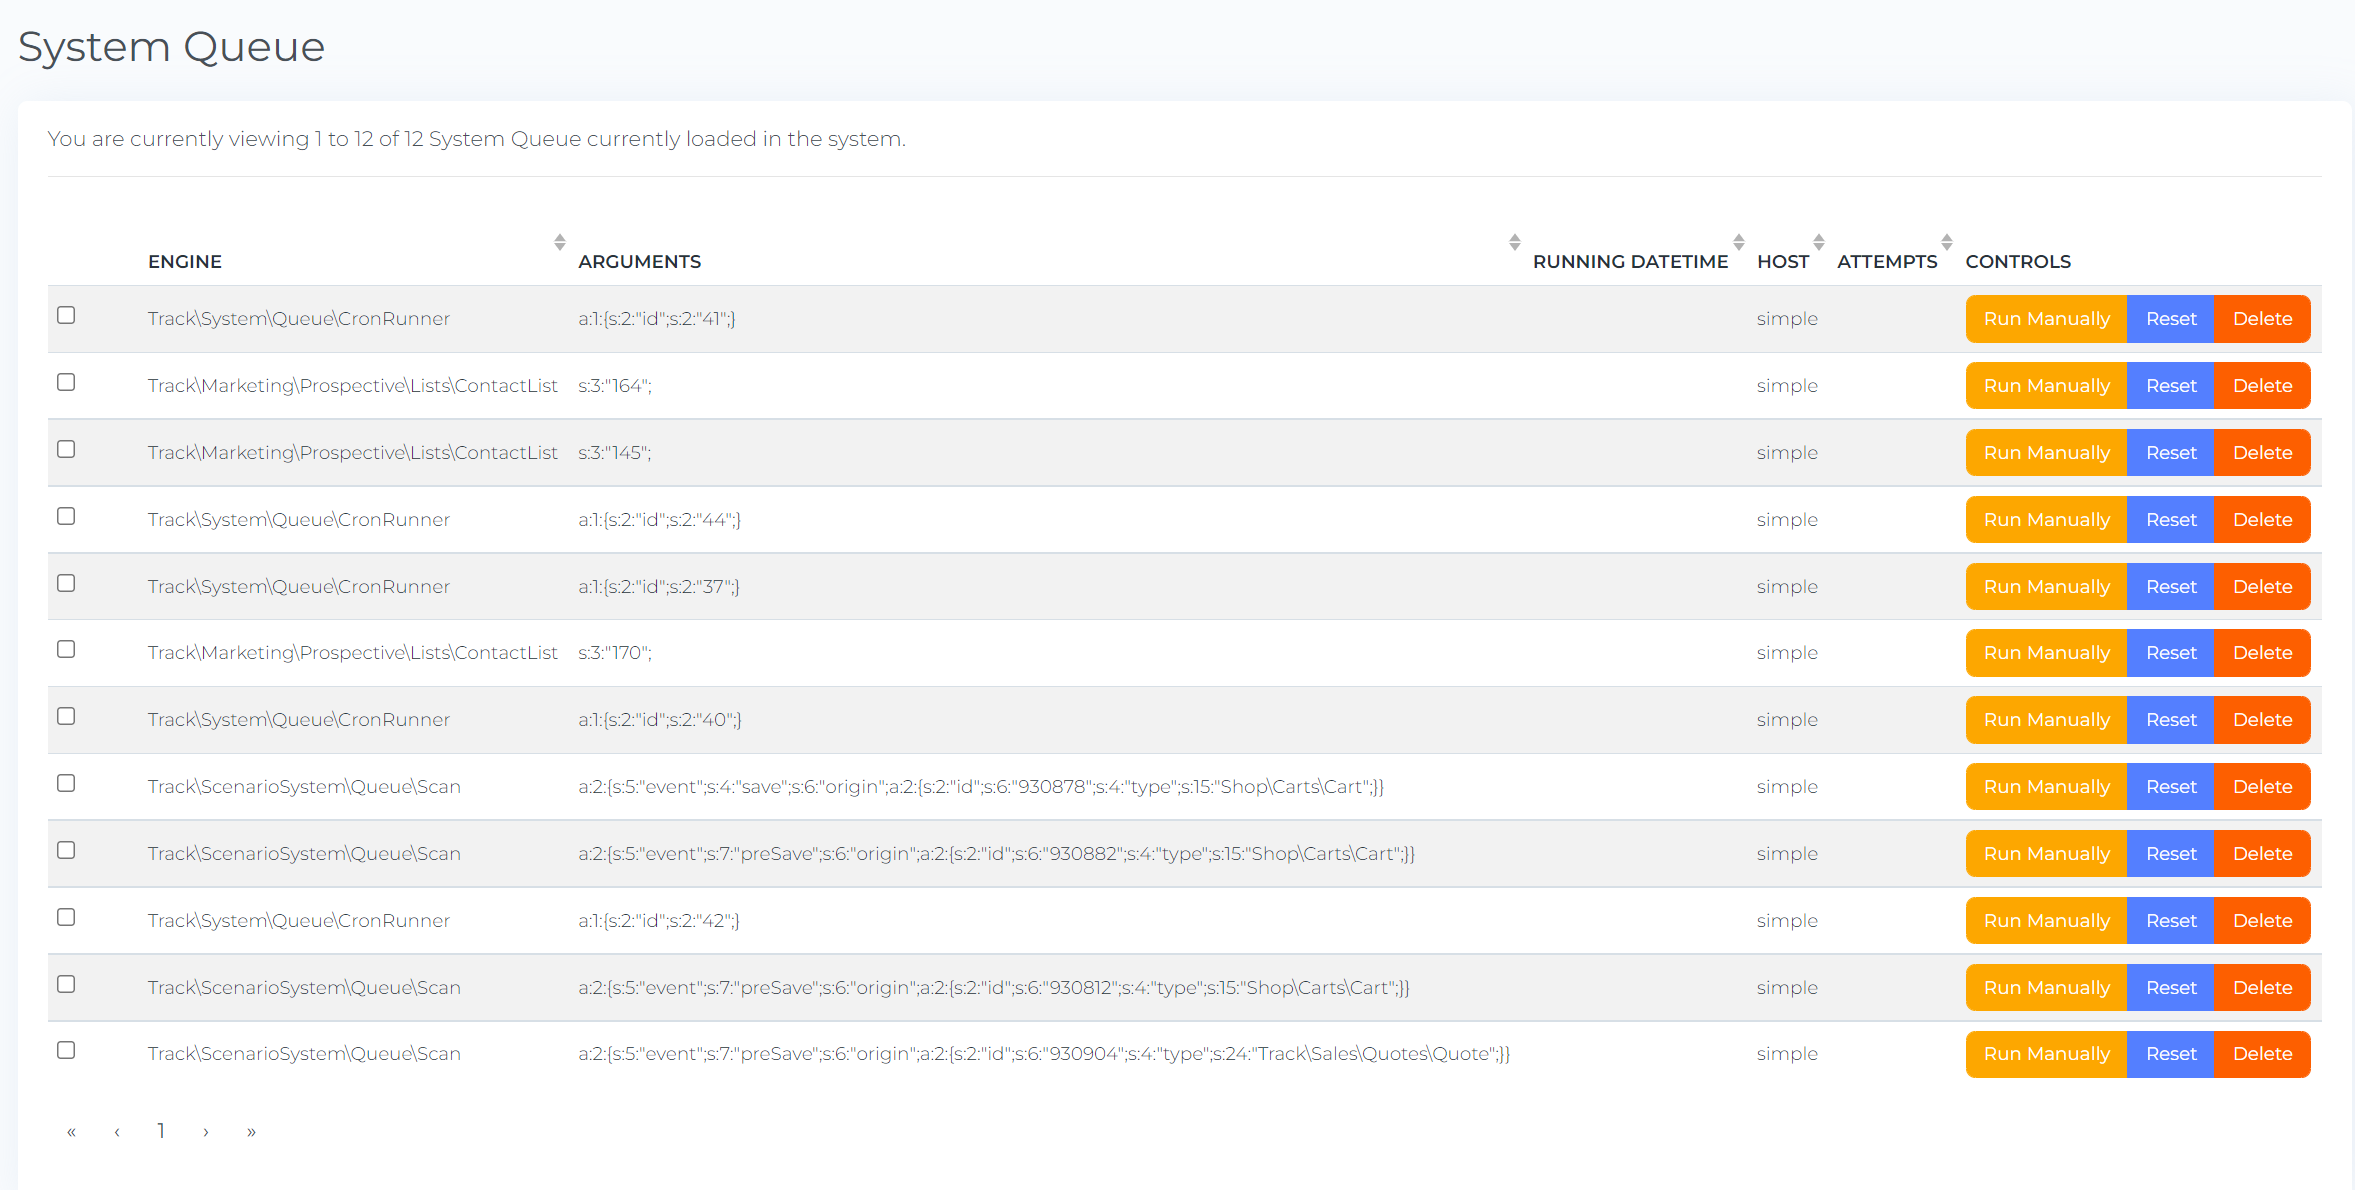
The Queue
The system queue is exactly that, a queue of jobs that the system processes in the background. Examples are sending emails, preflighting artwork, generating proofs, generating print files.
This keeps the system running fast as it runs in the background.
Monitoring the Queue
If you have the proper permissions you can monitor the queue from here: System Queue - MaticTrack (maticmedia.co.uk)
What Does Pre-Flighting Artwork Mean?
When uploading a file your file will be put into a processing queue where it will be automatically split into individual pages and then checked for quality against these parameters...
- Page Width
- Page Height
- Estimated Scale
- Maximum Recommended Scale
- Includes Images
- If images are included it will calculate DPI
- Fonts
- Minimum Font Size
- RGB mix Colours
- Spot Colours
- CMYK mix Colours
- Bleeds
At the same time it'll generate a CMYK jpeg proof for display in the artwork approval process.
Depending on the size / complexity of the file this can be quite an intensive process and may take up to 5 minutes.
What Does Proofing Artwork Mean?
This basically means converting the artwork into a jpeg that can be displayed to the user. This is also known as Image Rasterization.
Depending on the size / complexity of the file this can be quite an intensive process and may take up to 5 minutes.
Size vs Complexity
Just because a file is small does not mean it is not complex, an architecturual drawing is a much more complex than a 1 gigabyte image.
Uploading Artwork
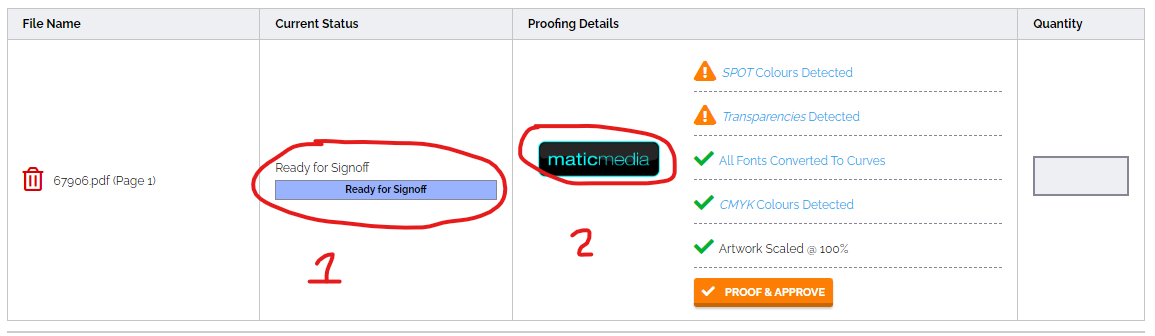
- Artwork Status
- File Proof
Artwork Proofing and Approving (Artwork Approval Process)
Step 1: Scale & Position
Artwork Scale
| Method | What it does... |
| Scale to Bleed Width | Scales the artwork up to the width of the artboard including the bleed |
| Scale to Bleed Height | Scales the artwork up to the height of artboard including the bleed |
| Scale to Finish Width | Scales the artwork up to the width of the artboard, not including the bleed |
| Scale to Finish Height | Scales the artwork up to the width of the artboard, not including the bleed |
| A Paper Scale up 1 | Scales the artwork 141% used for scaling A Sized documents e.g. A2 to A1 |
| A Paper Scale up 3 | Scales the artwork 283% used for scaling A Sized documents e.g. A4 to A1 |
| 100% | Does not scale the artwork |
| 400% | Scales the artwork 400% |
| 1000% | Scales the artwork 1000% |
| Custom Scale | Allows you to pick the width and height of the artwork |
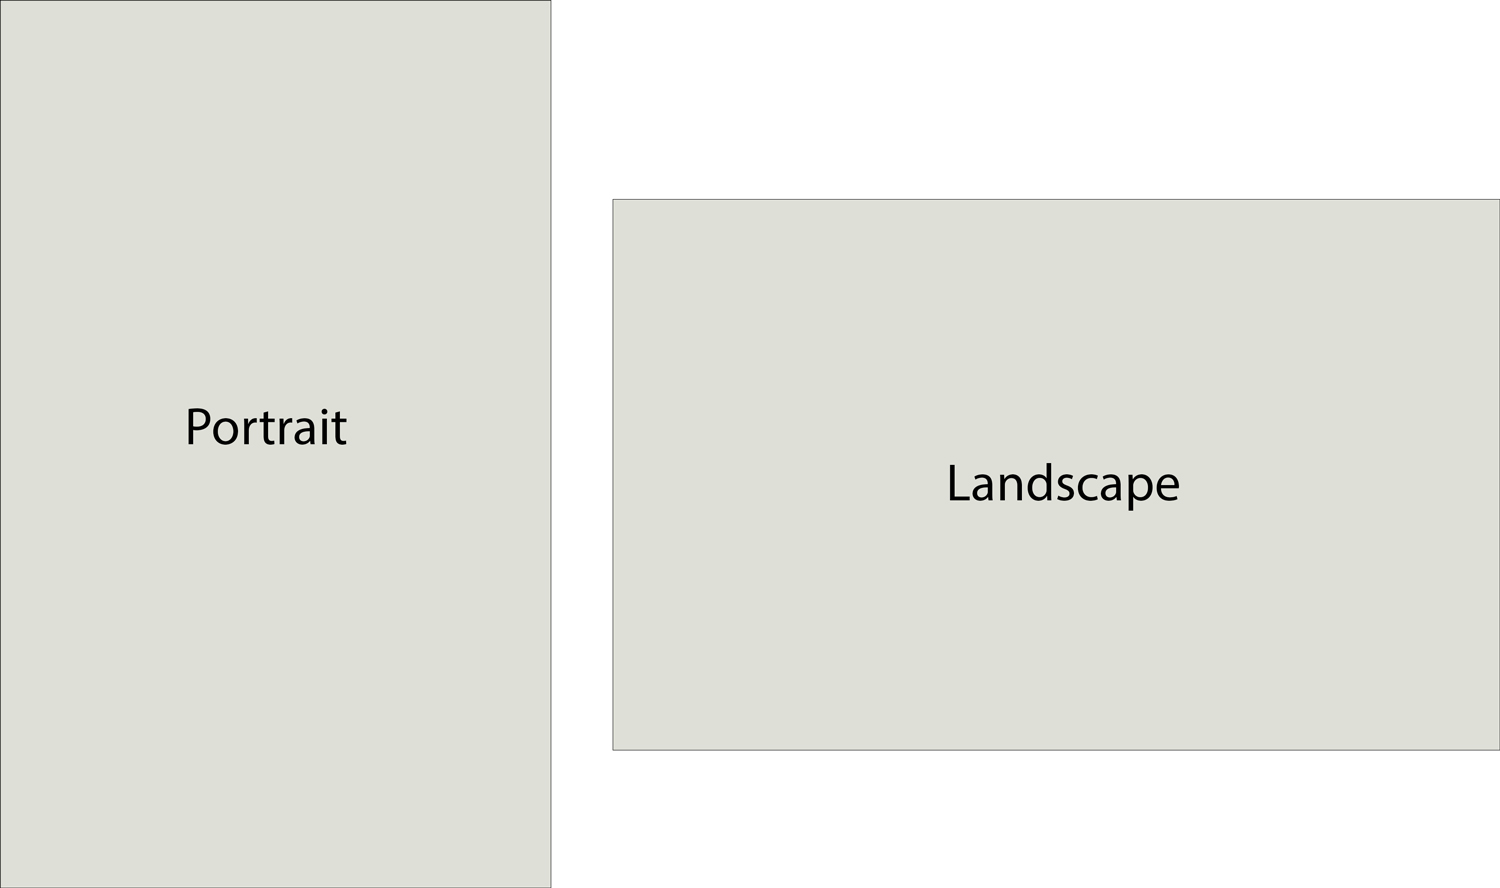
Orientation
Allows you to select the orientation of the ARTBOARD.

Rotation
Rotates the ARTWORK