Cleaning & Maintenance
Printing a Nozzle Check
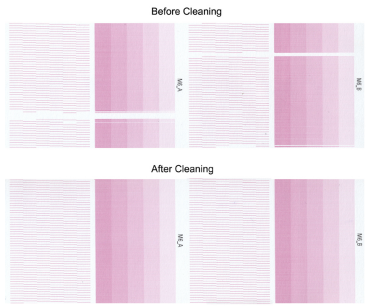
Once the print heads are clean you can now print to check the print quality, we usually print nozzle checks on a roll.
From the Arizona print station select to print on the roll, find the print nozzle check file, press print and start to begin.
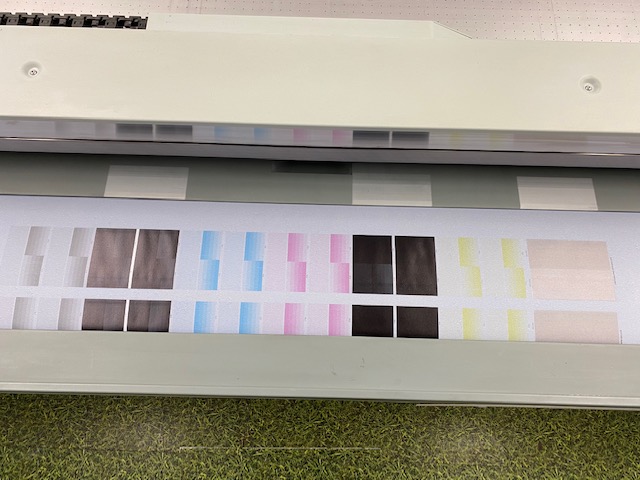
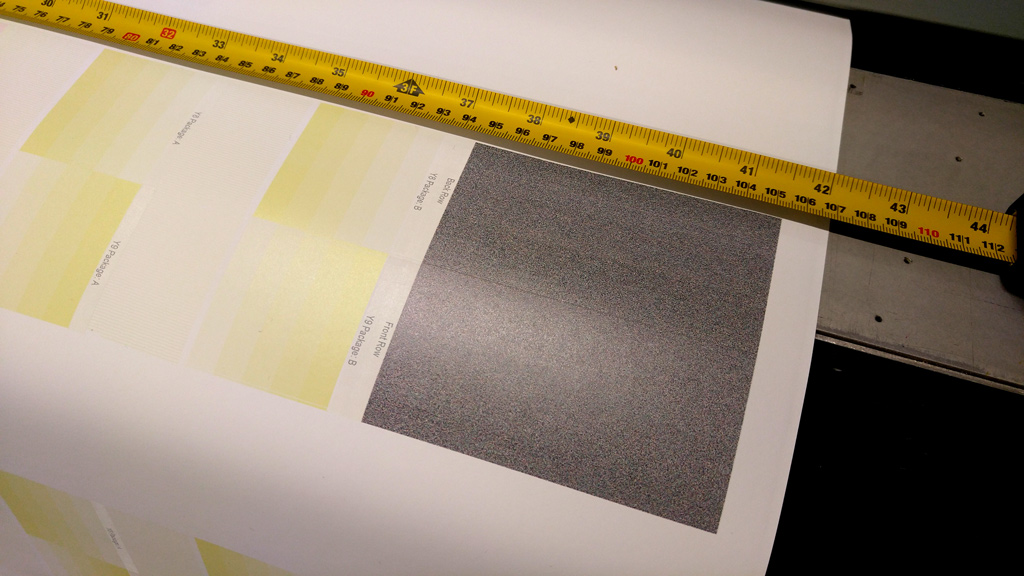
Once printed, you can check for any print issues from lines missing in the test print.
Check the previous test print if possible to see any print heads that are commonly out, you may not be able to fix them.
Cleaning the Printheads
Why?
The reason for cleaning the printheads is to remove any dust or grit the heads may pick up, which results in a poor print finish and potentially damaged printheads, which are expensive!
The cleaning process:
IMPORTANT Step 1:
For personal safety, we recommend that the operator always wear nitrile gloves, a protective
apron, and safety glasses with side shields when handling inks.
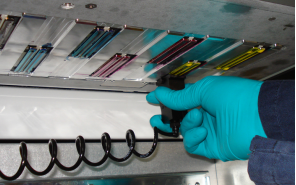
Step 2: Open the printhead tray under the nozzles.
Step 3: Press the first button on the right hand side to purge excess ink out of the heads.
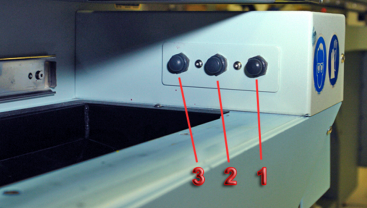

Step 4: Raise the print heads with button [2] in the middle to raise the carriage.
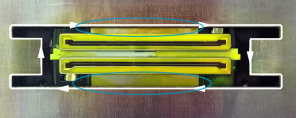
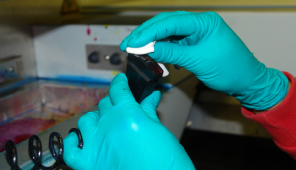
Step 5: Clean the edge of the excess ink tray with a fibreless cloth and use a dry swab to pick up any excess ink from around the edge of the printhead opening in the pan (see the white line with arrows in the image below). Take special care to remove any excess ink, flush or alcohol on the metal plate between the pan and the printhead (see the area covered by the two ellipses in the picture below). A single swab can be used for each colour channel or use it until the swab becomes saturated with ink.
Step 6: Press the third button away from you on the right-hand side to activate the vacuum. Use the head vacuum found on the left-hand side [make sure it's connected correctly] and clean it with the white fibreless cloth before use.
Step 7: Gently slide the vacuum along the print heads from left to right, making sure you get the slots of the vacuum piece into the printhead grooves. [you can leave the white heads to last]. Once you get the right connection you will hear the suction from the vacuum. In between each head clean, wipe the vacuum cleaner with the white fibreless cloth.
Step 8: Once all print heads are clean, you can turn off the vacuum and lower the print heads after use, then close the ink drip tray.
Step 8: Remove your latex gloves using the correct removal procedure.
Step 9: Assuming you have loaded basic paper on the roll. Go to the workstation to begin a print test. Press the button to turn on print to roll. Select the print test and begin print.
Step 10: Wait for the heads to heat up and it will then begin the test print.
Step 11: Checking the lines of the test print are correct there. Any missing lines could happen because of the heads not being cleaned properly or have always been missing, check previous test prints to check any patterns.
Changing ink
When to do:
An ink bag can be replaced at any time. Ink bags should be replaced if:
• The printer displays an "Error: ink fill timed out" message. This does not necessarily mean that
the ink bag is empty, but if you see it, check the level of ink remaining and change the bag if
needed. If you see the message and there is still ink in the bag, place a service call.
• The operator sees that the bag is empty.
• An ink bag is nearly empty and the operator wants to leave the printer unattended during a
long print and does not want the ink to run out. The nearly empty bag can be reconnected and
used up later when the operator is present.
NOTE
An ink bag can be changed during a print job. it is not necessary to stop the printer.
Safety Information - Use appropriate safety equipment - nitrile gloves and eye protectors. Take
precautions to avoid ink on your skin or in your eyes.
Where do we stock the new ink?:
You'll find our stock of ink bags in the wooden looking cabinet in the corner beside the door into the stock room.
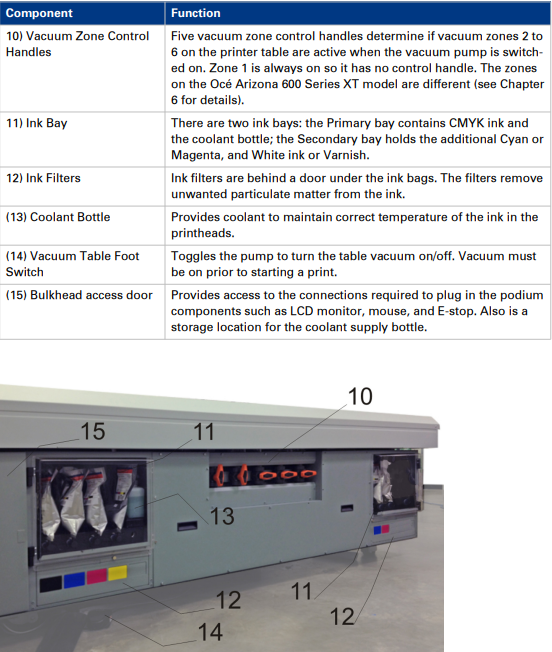
Where to find the ink bag input?:
Procedure:
1. Open the clear plastic door on the Ink Station.
2. Identify the ink bag to be replaced.
3. Press the quick-release coupler button at the bottom corner of the ink bag.
4. Unhook the bag from the top of the ink station.
5. Replace with a new ink bag of the same colour.
6. Push the quick-release coupler at the bottom corner of the new bag into place.
NOTE
If you place a bag in the wrong ink station (for example, yellow ink in the black ink station) the display will show an error message and the printer will not print until the correct bag is installed.